
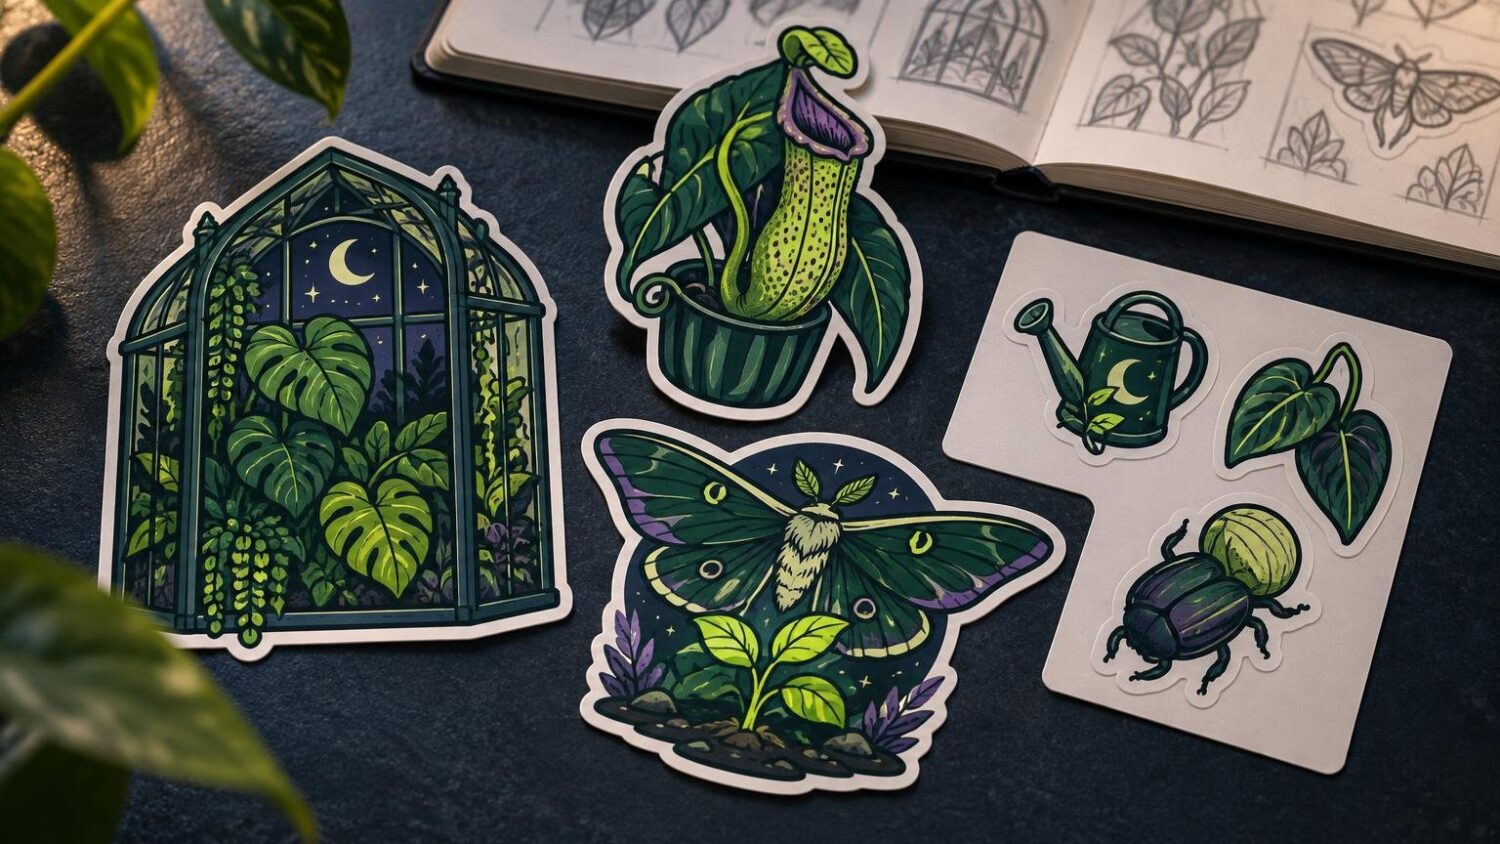
A moth resting against a greenhouse window gives this collection its first decision: preserve the insect’s readable silhouette before adding flowers, frames or reflections. Midnight Greenhouse should feel abundant, but its six finished stickers need distinct jobs. Give the three strongest silhouettes room to stand alone. Place the smaller moth, bud and glass details together on one sheet, where repetition makes them feel intentional rather than slight.
The working palette is midnight green, warm cream and amber, with a restrained blue-black for the deepest shadows. Green owns the glasshouse structure. Cream opens the flowers and separates their petals. Amber appears on moth eyes, wing spots and reflected lamplight, carrying one small point of warmth through the whole set.
Find the collection inside the sketchbook
Begin by spreading the sketches out as thumbnails. Ignore polished shading for the moment and look for shapes that remain identifiable when viewed from across the desk. A broad-winged moth, an arched window and an open moonflower can each hold a die-cut silhouette. A curled bud or sliver of cracked glass probably cannot carry the same visual weight by itself.
Test the likely hero drawings at their proposed finished sizes. The moth’s antennae should remain separate from the wing contour. The moonflower needs visible gaps between its overlapping petals. The greenhouse door needs enough contrast between frame and glass to read as architecture rather than a dark rectangle. If reduction closes those gaps, simplify the drawing instead of enlarging every line. The same principle applies when preparing any illustration for a two-inch sticker.
Sort the remaining sketches by relationship. A tiny moth gains purpose beside an unopened flower. A condensation drop belongs near a pane edge. A clipped leaf can echo the curve of the hero moth’s lower wing. These visual rhymes make a sheet feel composed, even when each element has its own cutline.
Make the six-piece edit
The following dimensions are proposed finished sizes, measured along each sticker’s longest side. They are starting assumptions for a physical proof, not universal production limits.
| Sticker | Format | Proposed size | Detail to protect |
|---|---|---|---|
| Glasswing Sentinel | Standalone die-cut | 3 inches | Open gaps around the antennae and tail tips |
| Moonflower Window | Standalone die-cut | 2.5 inches | Separation between cream petals and green frame |
| Greenhouse After Midnight | Standalone die-cut | 3 inches | Readable door frame and one amber pane |
| Lantern Moth | Sticker-sheet element | 1.25 inches | Two clear wing spots and a simple body |
| Furled Moonflower | Sticker-sheet element | 1 inch | A single cream edge around the closed bud |
| Cracked Pane Sprig | Sticker-sheet element | 1.5 inches | Bold pane break behind one clean leaf shape |
Glasswing Sentinel is the anchor. Its upper wings form a shallow roof shape, while the lower wings taper like leaves. Put one amber spot near each wing tip and keep the body almost black. The greenhouse appears as two or three internal pane lines rather than a complete building. At three inches, the moth should read first and the setting second.
Moonflower Window pairs a round bloom with an arched pane. Its cream petals create the brightest area in the collection, so keep the center small and let midnight green fill the negative spaces. Greenhouse After Midnight completes the trio with a tall door, one glowing pane and a vine crossing the threshold. Avoid filling every pane with foliage; one empty blue-black panel gives the eye a place to rest.
The three sheet elements repeat those ideas in simpler forms. Lantern Moth borrows the hero’s amber wing spots. Furled Moonflower shows the collection one moment before the large flower opens. Cracked Pane Sprig turns the greenhouse frame into a compact diagonal shape. Together they tell a small sequence: approach, growth and entry.
Build one line system for all six stickers
Use a bold outer contour around the major forms and lighter interior lines for veins, petal folds and reflections. The contour creates recognition at sticker scale; the interior work supplies atmosphere after the viewer looks closer. Do not give a one-inch bud the same number of vein lines as a three-inch moth.
Hand sketches can be converted into scalable vector artwork and refined after tracing. Adobe’s sketch-to-vector workflow also demonstrates increasing stroke weight when a drawing needs a bolder result. Treat automatic tracing as a beginning. Redraw lumpy flower edges, remove accidental points and check the artwork at its actual print size.
Outline view is useful for finding stray points, doubled paths and cutlines that cross the artwork. A second view at finished size reveals a different class of problem: gaps that appear generous while zoomed in but disappear when the sticker sits in your hand. Adobe recommends outline and multiple-window views as ways to inspect paths and artwork while working.
Compose the shared sticker sheet
A sticker sheet places multiple individually kiss-cut designs on one backing liner. The pieces may use different shapes and sizes, but they share the sheet’s material, finish and adhesive. That shared surface is useful here: the three smaller motifs will look like one miniature greenhouse study rather than leftover drawings.
Place Lantern Moth near the upper left, angled toward Furled Moonflower. Set Cracked Pane Sprig below them on the opposite diagonal. Leave an area of uninterrupted liner around each silhouette. One printer’s published requirements call for a closed cutline around every element, 2 mm between neighboring elements and the sheet edge, 2 mm of bleed beyond each cutline, and important details at least 2 mm inside it. Those measurements are printer-specific, so replace them with the specifications for the printer you choose.
Avoid using needle-sharp leaf tips or hairline antennae as structural parts of the cut shape. Very sharp corners, thin forms, narrow internal gaps and dense edge detail can cut or peel poorly. Bring the antennae into the moth’s surrounding border and slightly round the leaf tip. The drawing will keep its character while gaining a calmer, more durable edge.
Published minimums can also differ between pages from the same printer. For these sheet elements, treat 1 cm as a conservative floor until the selected printer confirms a smaller limit. The proposed one-inch bud is comfortably above that threshold, but its internal cream edge still deserves close inspection.
Order the small-detail sheet first
The first physical sample should be a 4 × 6-inch kiss-cut sheet containing Lantern Moth, Furled Moonflower and Cracked Pane Sprig at their intended sizes. Four by six and five by seven inches are both identified as common small sheet formats. Choose the same stock and finish planned for the full collection so the proof answers questions about color, linework and surface together.
This sheet is the best first test because it contains the collection’s smallest gaps, finest interior lines and most compact cut shapes. If the amber spots fill in, the bud loses its cream rim or the cracked pane becomes a dark knot, revise the linework before ordering the larger standalones. Also compare the midnight green across solid fills and narrow frame lines; a color that feels rich in a broad wing may appear nearly black in a thin pane.
When comparing sticker materials and artwork preparation options, keep the sample specification fixed: finished dimensions, shared palette, intended finish and individual cut paths. Once the sheet passes, order the three standalone pieces on the same material and inspect their color, cut edge and readability alongside it. Use a structured physical sticker sample check before approving the complete run.
Midnight Greenhouse works when every sticker feels like a view into the same place without repeating the same composition. The broad moth introduces the world, the window and door establish its architecture, and the three smaller pieces reward a closer look. Six pieces are enough: three silhouettes to collect individually and three details that become stronger by sharing a sheet.
Use Glasswing Sentinel, Moonflower Window and Greenhouse After Midnight as the three standalones. Their moth, arched bloom and greenhouse-door silhouettes remain distinct at sticker scale. Place Lantern Moth, Furled Moonflower and Cracked Pane Sprig on the sheet. Together, the smaller motifs read as a deliberate sequence rather than three slight standalone designs. Let midnight green lead, use warm cream to open the flowers and reserve amber for wing spots, moth eyes and lamplight. Blue-black can hold the deepest shadows without competing with the green. Start Glasswing Sentinel and Greenhouse After Midnight at 3 inches, Moonflower Window at 2.5 inches, Lantern Moth at 1.25 inches, Furled Moonflower at 1 inch and Cracked Pane Sprig at 1.5 inches. Treat these as proofing assumptions, not universal production limits. Order a 4 × 6-inch kiss-cut sheet with Lantern Moth, Furled Moonflower and Cracked Pane Sprig at their intended sizes. Four by six is a common small sheet format, and this proof puts the finest lines, smallest gaps and most compact cuts under pressure first. Check that the moth’s antennae remain separate, the moonflower retains gaps between petals and the greenhouse frame still reads as architecture. If those details close up, simplify the drawing before adding more line weight. Follow the chosen printer’s specifications. One published guide calls for closed cutlines, 2 mm between elements and the sheet edge, 2 mm of bleed, and important details at least 2 mm inside the cutline, but those measurements are printer-specific. No. Use tracing as a starting point, then redraw uneven flower edges, remove stray points and inspect the work at its actual print size. Adobe also recommends outline and multiple-window views for checking paths and artwork. Frequently Asked Questions
Which Midnight Greenhouse designs should be standalone stickers?
Which motifs belong on the shared sticker sheet?
What palette keeps the six stickers connected?
What sizes should the six stickers start at?
Which sample should the artist order first?
What should the artist inspect at finished size?
How much space should sit around each sheet element?
Should automatic vector tracing be treated as finished artwork?